
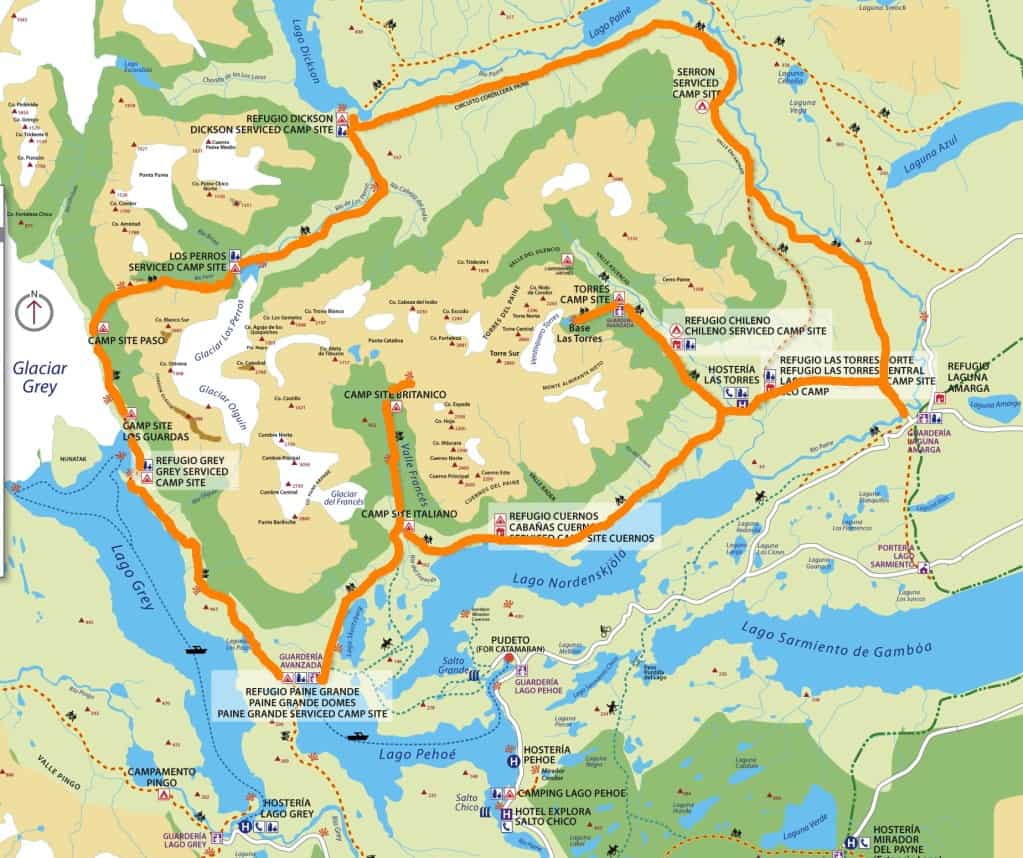
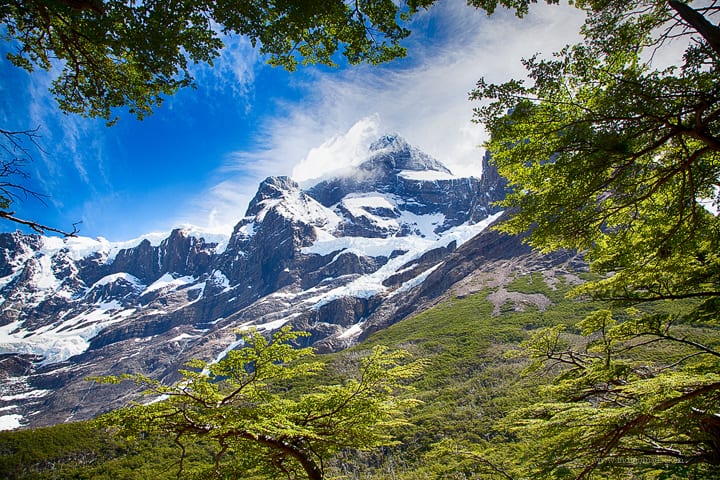
So, you have decided to spend more time at the park and brave ‘O’ circuit hike. Excellent decision !!!
Before proceeding, read “Patagonia Packing List” for a detailed list of things to consider/pack for the trek.
Also read, ‘W Itinerary’ to learn about details on how to get to Torres Del Paine and other logistics.
2018 / 2019 Update:
- O circuit can only be hiked in counter clockwise direction
- All campsites must be pre-booked
- You need to take a physical print out the campsite booking and your passport
- Most trails apparently have time cut off to reach.
I found this really cool website that gives availability of all the campsites in one place. I personally don’t know the person who made this site. But it’s a cool website and thanks to him for making this. https://torresapp.com/browse_availability
We started the hike at Laguna Amarga entrance because, the first two days are relatively flat and thats when the backpacks are at their heaviest.
How to reach Torres Del Paine ?
As I have discussed in W Trek article, the only entry point to Torres Del Paine is through Puerto Natales.
Flying, taking a ferry or driving are some of the options to get to the Puerto Natales.
How about a creative, budget friendly and fun way to travel through Chile to reach Torres Del Paine ? Learn about Why you should Motorhome Chile ?
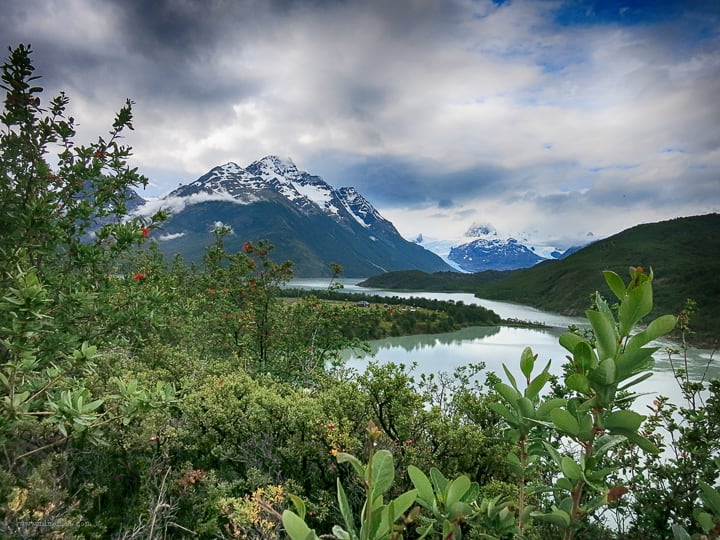
Day 1: Los Torres to Camp Seron.
Distance: 9 KM – Estimated time: 4hrs
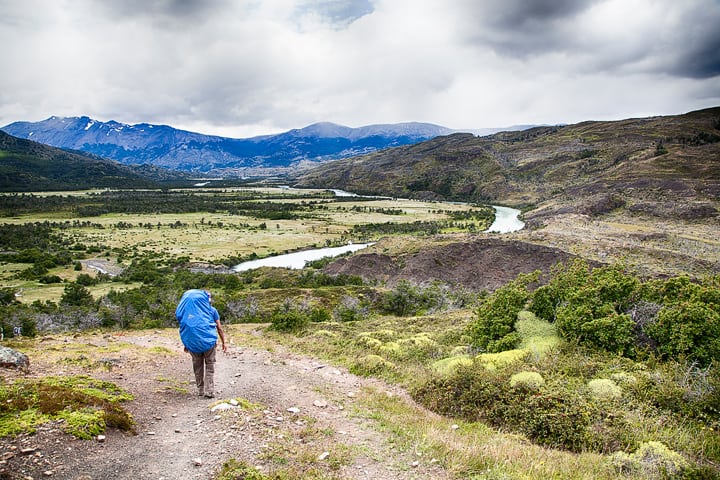
The trail is relatively flat. Most of the way, there are beautiful meadows and wild flowers. On day one, we realized that within a 20minute time frame the weather can drastically change from rain to bright sunlight.
This trail is particularly blessed with lots of springs, streams and rivers. So, you can continue to fill your water bottle every 30-mins.
Make sure to slow down, especially on day one, to enjoy the stunning beauty of the trail and take your time to get to the campsite.
Keep in mind, in the summer, there is sunlight till 11PM at night.
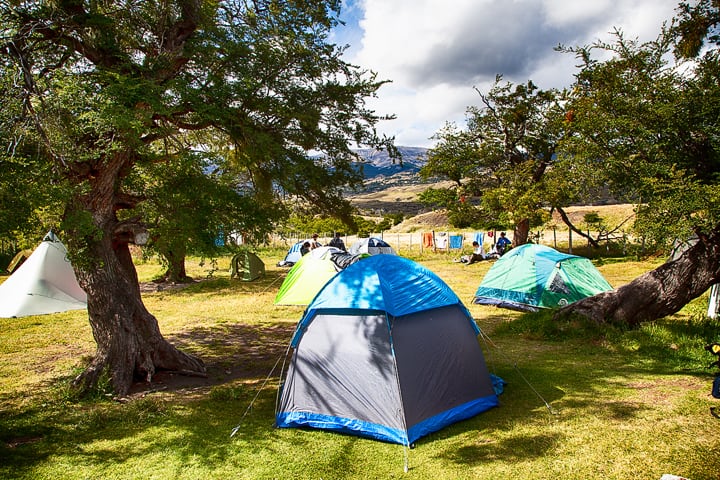
Seron campsite has a small shop where you can get snacks like chips, snickers, bars and alcohol. There are free hot-showers and flush toilets.
Day 2: Seron to Dickson
Distance: 19 KM – Estimated time: 6hrs
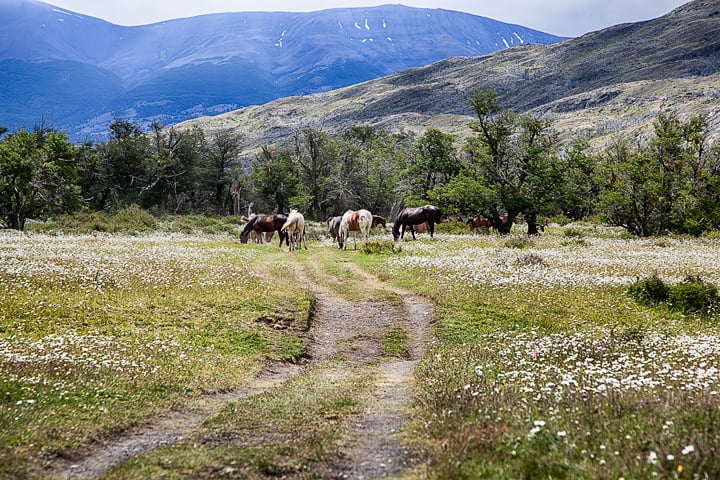
One of the most beautiful days on the trek. Everywhere you turn, there are wild flowers and wild horses.

This campsite/trail had the most number of mosquitoes 🙂
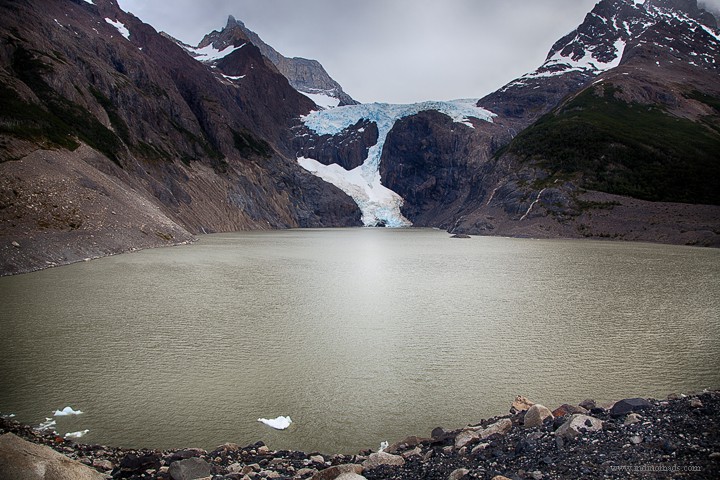
Day 3: Dickson to Los Perros
Distance: 9 KM – Estimated time: 4.5hrs
This trail starts to go into the forest region of the park. On a rainy day, it gets swampy. Wear gaiters to protect the shoes/pants.
At this point, you are almost at the back of the park. And you get some spectacular views of glaciers, rivers and mountains.
The hike is relatively hilly than the previous two days.
The campsite at Los Perros is pretty basic. No hot shower available.
Day 4: Los Perros to Campo Paso
Distance: 12 KM – Estimated time: 6.5hrs
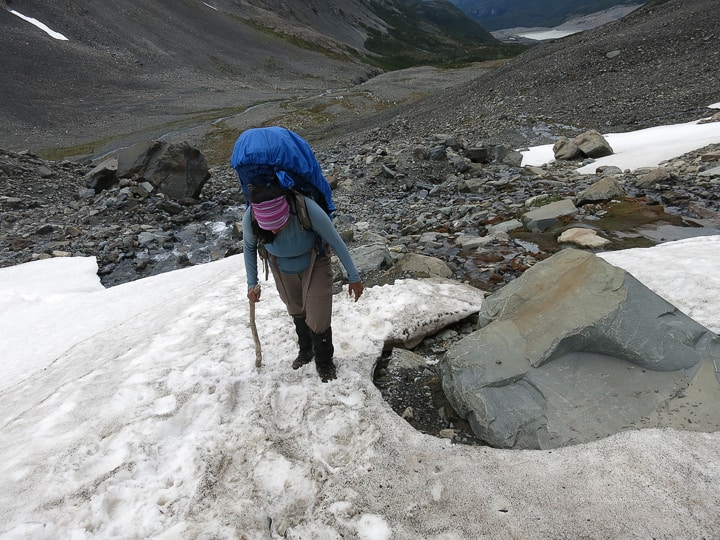
The toughest day of the entire trek and is known for very strong winds. It’s a knee-popping day of 1200m climb and after you reach the top, a steep drop off approximately 700m to reach the campo Paso.
The trail is pretty much rocky all the way to the top. And it slowed me down tremendously, especially with the heavy backpack.
There is a small patch of ice to walk on right before reaching the top of John Gardner Pass.
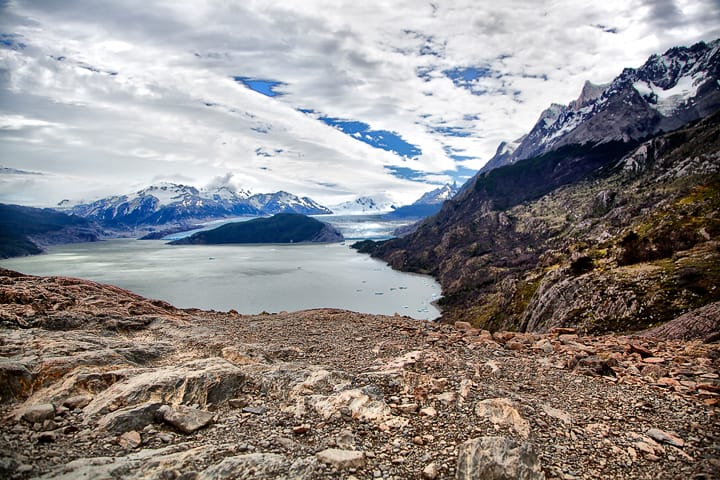
Once you reach the top, you get the first glimpse of Glacier grey. From this point on, it’s all down-hill.
One could be misled to think that downhill is easy. But, this particular downhill is not easy, especially if it rains.
The day when we were on the pass, it started raining heavily, making the trails very treacherous.
The trail is supposed to take an average of 6.5-hours to get to Camp Paso, for us it took a solid 13-hrs to reach.
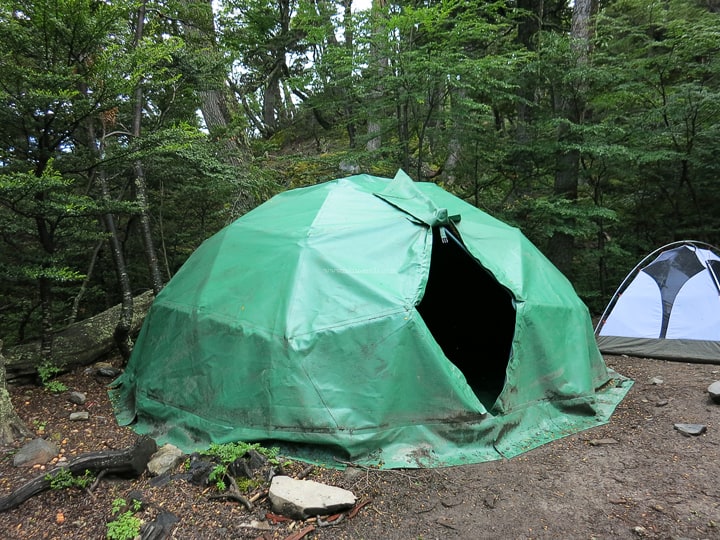
Due to rain, we couldn’t pitch the tent outside. The park rangers were amazing enough to allow us to pitch the tent in the “dome”, where it is relatively dry.
Day 5: Camp Paso to Camp Glacier Grey
Distance: 10 KM – Estimated time: 5hrs
Beautiful views of Glacier grey all the way through. Neck might hurt from constantly looking back at the stunning beauty of the glacier.

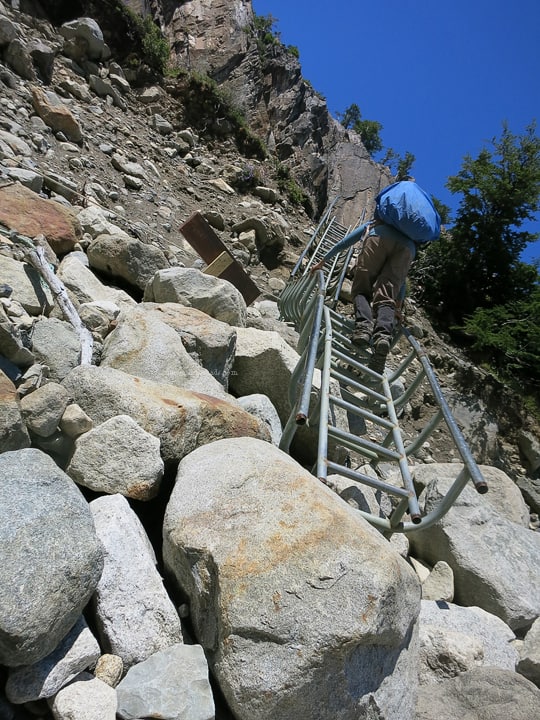
This day involves crossing a bridge and climbing a couple of pretty scary ladders.
The ladders shake and swing. Just trust the structure and believe you can make it.
Day 6: Glacier Grey to Paine Grande
Distance: 11 KM – Estimated time: 3.5hrs
One of the easiest hike effort-wise. And yet, the stunningly beautiful views of the glacier grey.
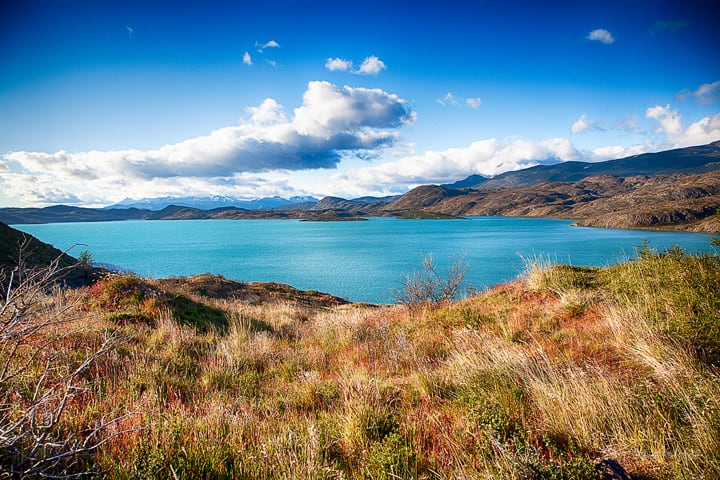
Paine Grande campsite is by far the most spectacular campsite, situated in the valley of mountains and at the bank of Lake Pehoe.

Since the campsite is in the open area, it is also the windiest area to pitch a tent.
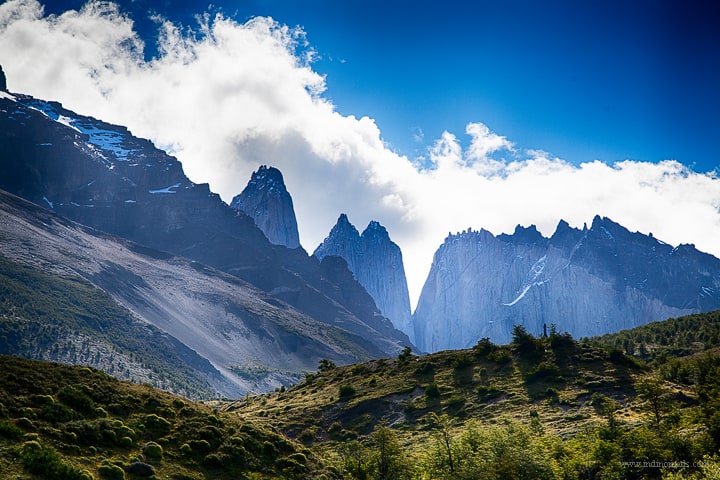
Day 7: Paine Grande to Italiano to french valley
Distance: 13 KM – Estimated time: 7hrs
You hike to Italiano, leave the backpack at the ranger station, with snacks and water, you hike the remaining 5.5km(one way) to the french valley and return to Italiano campsite for overnight stay.
If you plan to camp at Italiano, get there as early as possible. This one of the most famous, free campsites (other campsites are for a cost. Takes Pesos with you) and it gets filled very quickly. If you don’t get a spot, don’t worry. Just walk to Los Cuernos, another 5.5-km.
Day 8: Italiano to Camp Torres
Distance: 22 KM – Estimated time: 10-hours
This is the longest day of the trail. Primarily to reach the torres in the evening, so you can hike the next day morning for sunrise.
If you don’t fancy this 22KM hike, consider taking the catamaron from Paine Grande to Los Torres. And you can do a day-hike to Torres for the view.
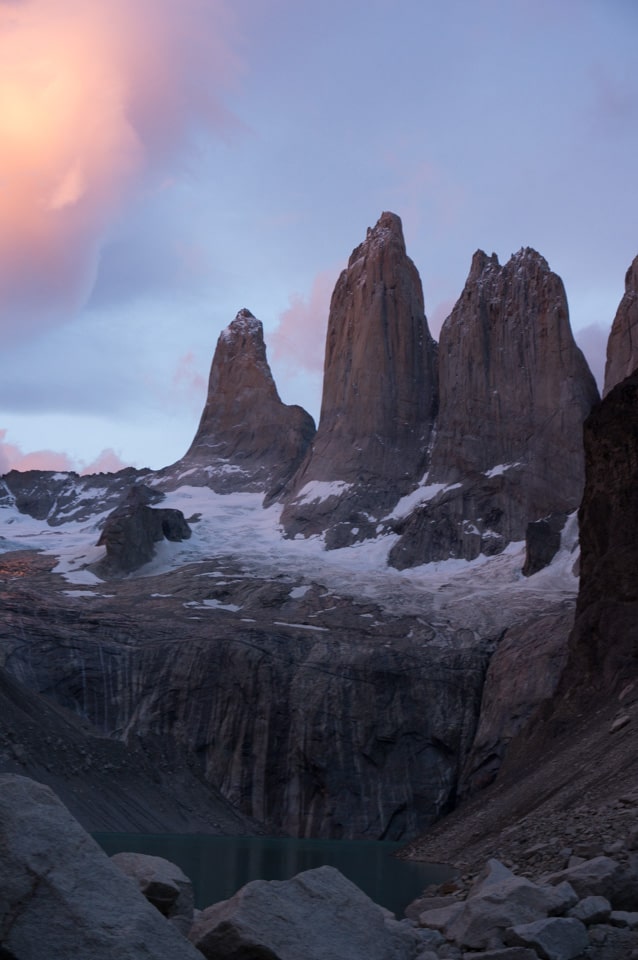
Day 9: Sunrise hike to Torres and back to Hotel Los Torres and out of the park
Estimated time: 4.5hrs
Very early morning wake up, like 4:30AM and an hour long hike to Mirador Torres. It gets really cold waiting for sunrise. Some people take, sleeping bag, sleeping pad to keep themselves warm along with layers. And it is a great idea.
Sleeping pad helps with sitting around on the cold rocks.
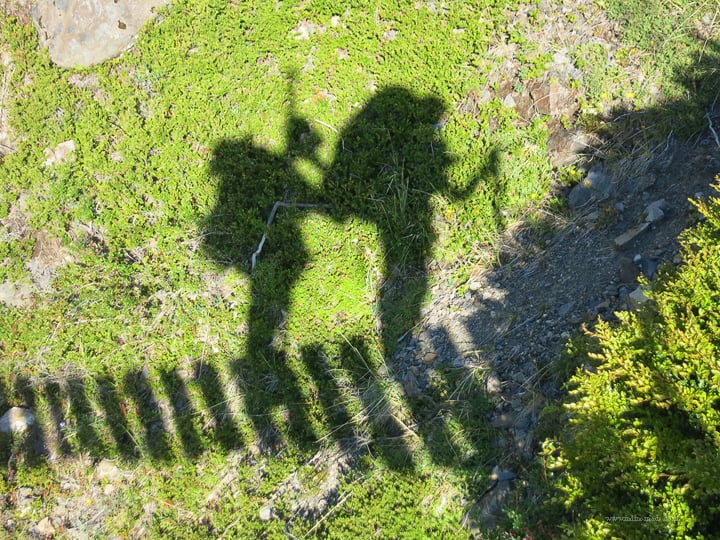
This is an itinerary for a slow hiker. We met people who finished the hike in 7-days by pushing an extra campsite forward everyday.
Here is an elevation map of the terrain:

Random Info:
- My backpack weight – 40lbs
- Chakri’s backpack weight – 50lbs
Lessons Learned:
- We did the mistake of not taking hiking poles and used wood on the trail. Fell down twice as the stick broke.
- If you keep up with this kind of activity, at the age of 60, you will be faster, fitter and more adventurous than you are now.
- There is compassion and humanity to experience than just scenery on the trail. Couldn’t be more grateful to fellow hikers and rangers for making sure we arrived safely on the 13-hr pass day.
- Every hike brings its own challenge. For Everest Base Camp, Kilimanjaro and Annapurna circuit it was altitude. Here in Patagonia it’s the backpack weight.
If you still have few more days in Chile, consider visiting Isla Magdalena to see Penguins or climb Volcan Vallarica.